This site will look better if you upgrade to a browser that supports web standards.
This site will look better if you upgrade to a browser that supports web standards.
 McGimpsey & Associates
 When you create a macro, either in the Visual Basic Editor or by recording it, you can run it from the dialog:
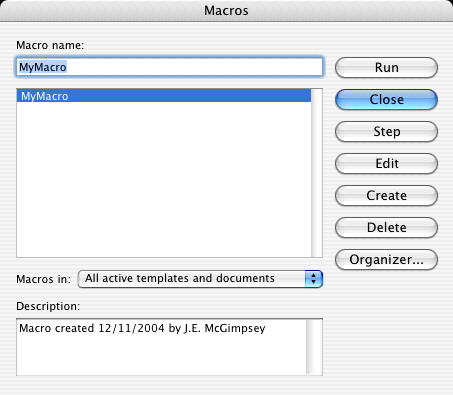
But you can also run macros from a menu, by clicking a toobar button, or by typing a keyboard shortcut. This is much more convenient when you need to run the macro frequently.
This page assumes you have already created or recorded a macro.
Macros live in modules, which are part of a document or template. By default, recorded macros are placed in the Normal template in the NewMacros module.
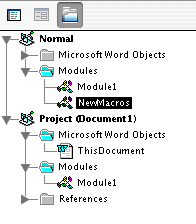
You can, however, rename the module, or copy and paste a macro to another module. Modules can have many macros, or they can have none (a module may be used to store global variables, for instance).
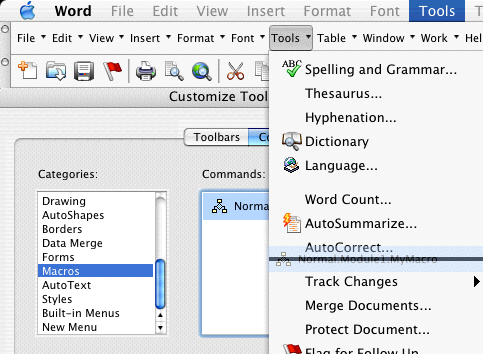
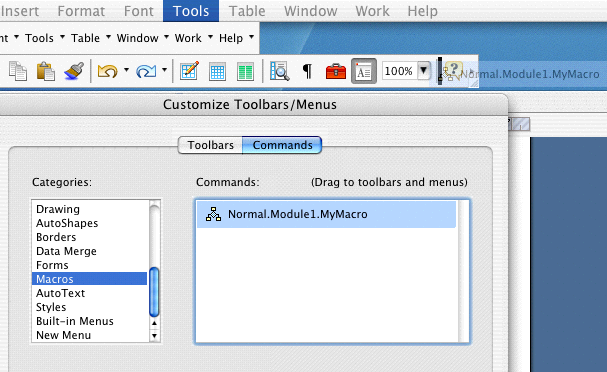
To place a macro on a menu so that you can select it just like any other menu item, choose The dialog will open and an extra toolbar will appear just underneath the menu bar, that contains all the controls for the menu. Click on , then scroll down on the left hand pane of the dialog, and click on .
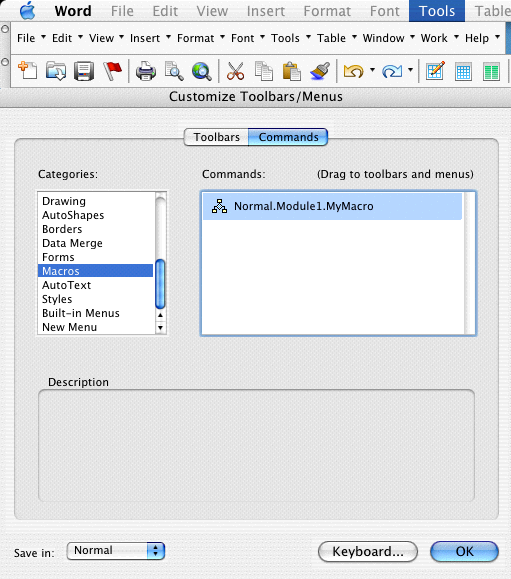
Select your macro from the right-hand pane and drag it to the menu item you want to place it in. For instance, to place in the menu, drag the icon to the dropdown then place it where you want it - the black bar indicates where it will go:
Click . Your menu now has a new control - the Normal.NewMacros.MyMacro item. See below for instructions on how to change the macro name in the menu.
Assigning a macro to a toolbar is similar to putting a macro on a menu. Choose to display the dialog. Click the tab, and choose from the listbox. Drag your macro's icon to the toolbar of your choice
a thick black line will show you where the button will be placed. The button's face will have the name of the macro. See below for instructions on how to change the macro name on the button.
You can assign a keyboard shortcut to a macro when you record one, but macros you write (or copy from other sources) can also be assigned a shortcut, just as any other command. and choose from the listbox.

Select your macro and type shortcut in the indicated textbox. Make sure you click . If you click instead, the shortcut won't be saved.
Having a macro name of is very specific as to where the macro's located, but you don't really need to know the location, usuually, and on buttons, it takes up a lot of real estate.
Choose In the menu toolbar, locate your macro, Ctrl- or right-click the item and choose
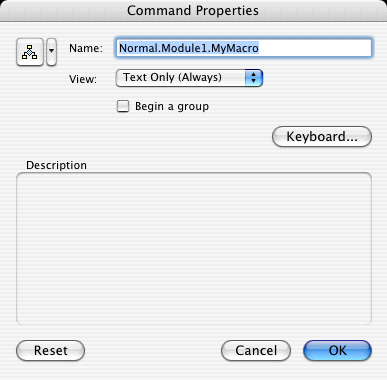
Change the name to whatever you like. It changes only the name on the menu, not the name of the macro itself.
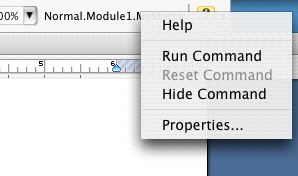
Changing the button name is similar to changing the name in a menu. You don't have to go through the hassle of choosing however. Just Ctrl- or right-click on the button and choose from the pop-up menu.
Change the name as to whatever you like in the dialog.
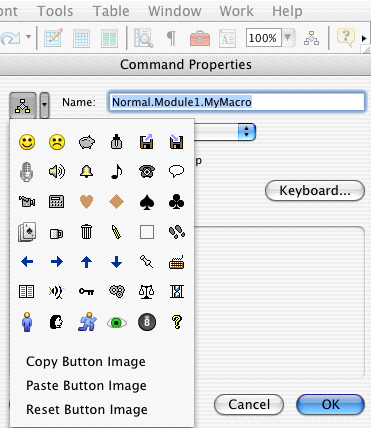
You can change the button face from the name of the macro to a pre-set or custom icon, just like the built-in buttons. To do so, Ctrl- or right-click on the button, and choose from the pop-up menu. In the dialog, choose from the pop-up menu:
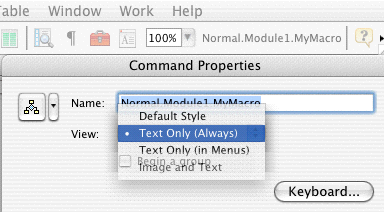
Now choose an icon from the pop-up menu
To copy a button image from another toolbar button, even from a button in a different Office application, in that button's dialog, chose from the pop-up menu, then choose in the pop-up in your macro button's Properties dialog. See Copy an image from one toolbar or menu command to another in Word Help.
You can also create your own custom button faces - just copy any graphics image from a graphics program and use the command. The graphic will be scaled to fit, so smaller images work best (20 x 20 pixels is the default button resolution). See Copy an image from a graphics program to a toolbar button or menu command in Word Help.
© Copyright 2001 - 2004 McGimpsey and Associates. Except where noted, all code on this site may be distributed under the Gnu GPL. Acknowledgement is appreciated.
![]()
![]()
![]()